
Chainsaws are powerful tools. To work safely and cut accurately, chainsaws require the correct bar and chain sizes along with proper safety requirements. The bar and chain work harmoniously to ensure effective cutting performance and safety. If you need a new bar or chain, selecting the wrong size can lead to safety hazards, equipment damage, or ineffective cutting performance. It can be unsafe, damage your saw, or just not cut properly.
This guide will show you exactly how to measure your chainsaw bar and chain. We will use simple steps. This way, you can be sure you buy the correct replacements. Knowing these measurements helps you keep your saw running right.
1. How to Measure a Chainsaw Bar
The bar, a long metal component of the chainsaw, guides the chain while cutting wood. The chain wraps around it. The correct bar size is crucial for achieving balance and optimal cutting ability.
What is a Chainsaw Bar?
A chainsaw bar is a solid piece of metal, typically made of a steel alloy. It has a groove around its edge that holds the chainsaw chain. The bar has a mounting end that connects to the chainsaw body and a tip end that guides the chain. The tip has a sprocket on most modern bars. This sprocket helps guide the chain smoothly around the tip of the bar, enhancing cutting efficiency. The length and type of bar must correspond to your saw's engine power and the specific cutting tasks you intend to perform.
Types of Replacement Chainsaw Bar
The bar itself has different designs. The bar must match the chain's pitch and gauge, while the cutter style pertains specifically to the chain itself. We will discuss chain cutter types in detail when we cover chains. The types of chainsaw bars are more about their construction or tip. Here are a few common ones:
Sprocket Nose Bar
This is the most common type today. It has a small sprocket on the bar's tip. This helps reduce friction, making the chain run smoother and faster. It is good for most cutting tasks.
Hard Nose Bar
This is an older type. The tip is solid metal without a sprocket. These bars are very durable, particularly in abrasive conditions, but they generate more friction, leading to increased wear on the chain and reduced cutting efficiency. They are no longer used as frequently, except for very demanding tasks or older models of saws.
Laminated Bar
These are made from layers of steel pressed together. They are lighter and often found on smaller or homeowner saws.
How to Measure The Length of a Chainsaw Chain Bar
When people refer to bar length, they typically mean the cutting length, which is the useful length for cutting wood, as opposed to the total length of the bar. Bars also have an overall length, from the tip of the bar to the end of the part. However, this is not the size you use when buying a replacement bar for cutting.
How to Measure the Cutting Length of a Chainsaw Bar?
The cutting length is the most important measurement. It tells you how much bar can actually be used to cut wood. This is the size you see listed on the bar packaging. Here is how to measure the cutting length:
a) Make the Saw Safe
To be extra safe and prevent accidental starts, turn off the chainsaw, make sure the engine is cool, engage the chain brake, and remove the spark plug wire.
b) Place the Bar
Lay the chainsaw down on a flat surface so that the bar is easily visible and accessible for measurement.
c) Find the Measurement Points
You will measure from the very tip of the bar to the point where the bar connects to the saw body, which is typically at the mounting area. This is usually right where the bar nuts are located. At this point, the chain enters the chainsaw's housing, where the sprocket drives it.
d) Use a Tape Measure or Ruler
Place the end of your tape measure or ruler at the very tip of the bar, centred along the bar.
e) Extend the Measure
Run the tape measure straight along the bar towards the powerhead.
f) Read the Measurement
Read the measurement where the bar edge meets the saw body.
g) Double Check
Measure again to be sure. Some bars have a rounded tip, also known as a sprocket nose. Measure from the very front edge of the curve. For bars with a flat tip (also known as a hard nose), measure from the flat end.
How to Shorten a Chainsaw Bar
Shortening a chainsaw bar is generally not recommended due to the risk of compromising its structural integrity and performance. This requires special tools, skills, and heat treatment processes that most people do not have. Trying to shorten a bar could:
- Weaken the bar.
- Change the bar groove size, as it causes the chain to fit incorrectly.
- Damage the bar tip or sprocket system.
- Make it impossible to tension the chain properly.
If you need a shorter cutting length, the correct approach is to purchase a new bar that matches the required size, provided it is approved for your saw model. Do not try to cut down an existing bar.
2. How to Measure a Chainsaw Chain
The chain is the loop of cutters that spins around the bar. It is what actually cuts the wood. Getting the correct replacement chain is critical. A wrong chain size will not fit the bar and will not mesh with the saw's drive sprocket.
What is a Chainsaw Chain?
A chainsaw chain is made of many small metal parts joined together. These parts include:
Cutters: These are the sharp, L-shaped teeth that cut the wood. They alternate left and right.
Drive Links: These are the triangular or pointed links on the bottom of the chain. They fit into the bar's groove and are driven by the powerhead's sprocket. The number of drive links, in conjunction with the pitch and gauge, determines the overall length of the chain.
Tie Straps: These flat links connect the cutters and drive links.
Rivets: These small metal pins hold all the parts together, making the chain flexible.
Chains vary in terms of pitch, gauge, and the number of drive links.
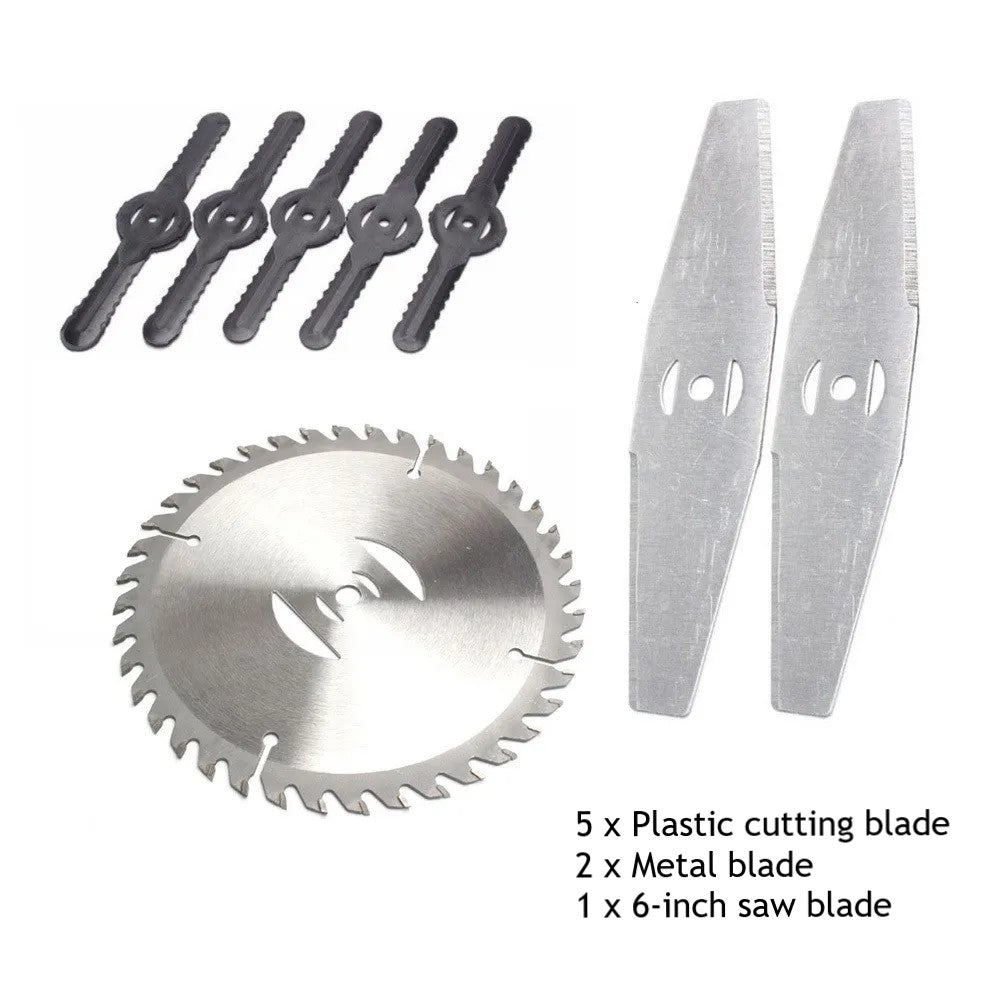
Types of Replacement Chainsaw Chain
This is where the terms you listed for bars actually apply. Chains have different types of cutters, affecting how they cut and how much kickback they produce.
Full Chisel
These cutters have sharp, square-cornered teeth. They cut very fast and aggressively. They are best for cutting clean wood with powerful saws. However, if not handled correctly, they can cause more kickback.
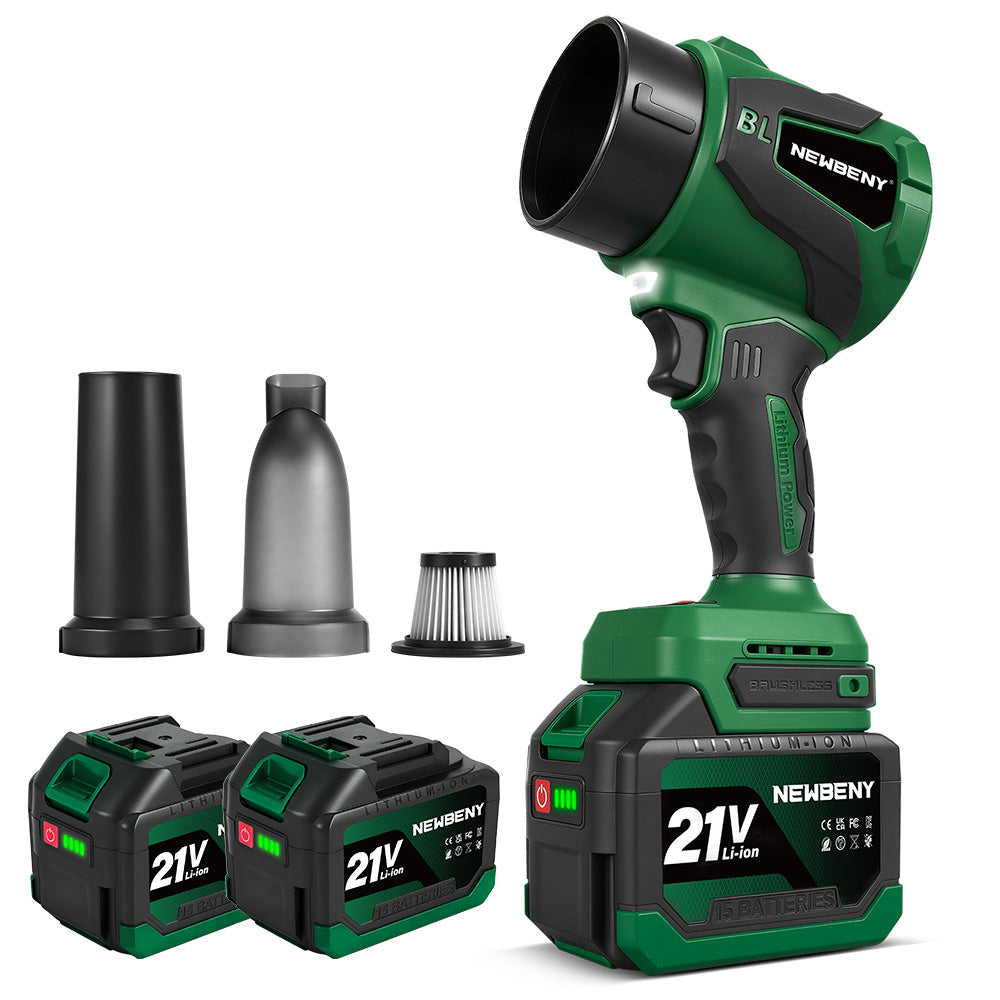
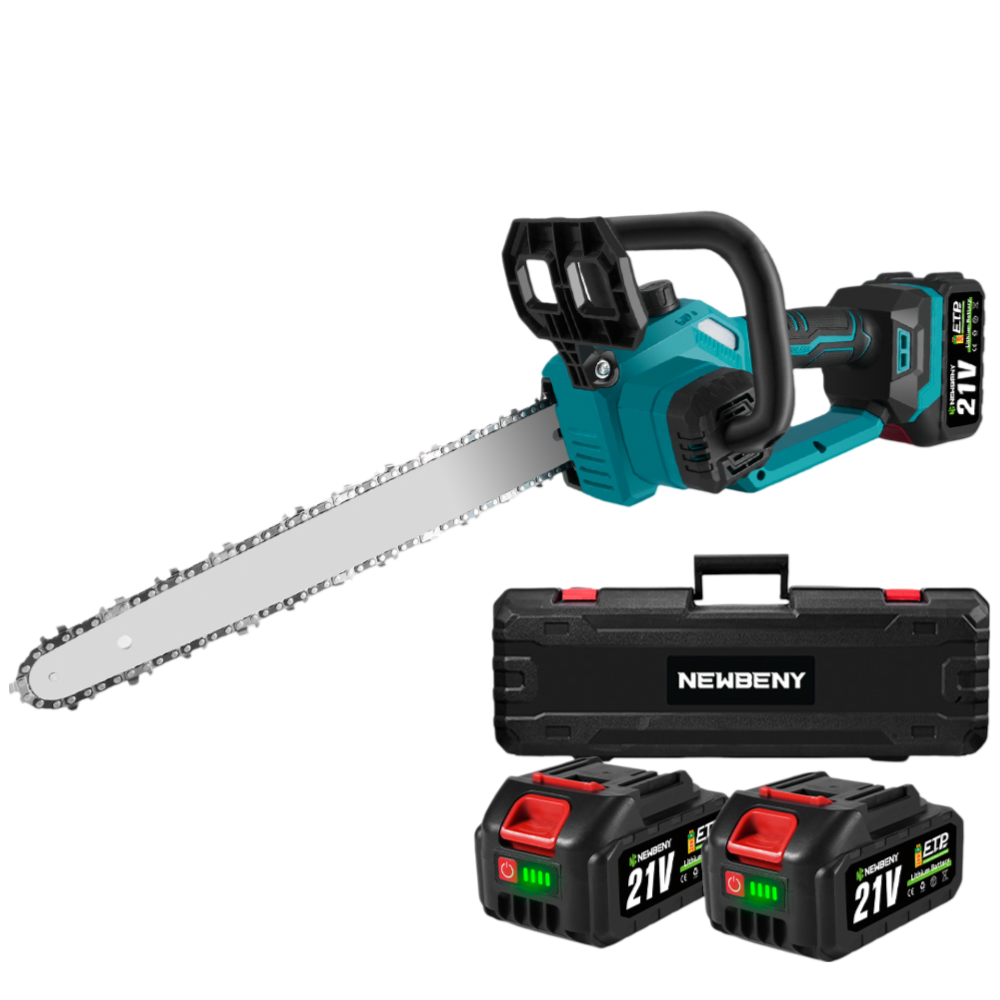
The NewBeny 16-inch cordless chainsaw utilizes a full-chisel chain. This chain provides the maximum cutting speed for its saw size. Professional loggers often use it for fast cuts in clean softwood.
Semi-Chisel
These cutters have rounded working corners. They cut slower than a full chisel but stay sharp longer, especially in dirty or hardwood. They have less kickback than a full chisel and are good for general use and homeowner saws.
Low Profile
These chains are sometimes called "mini" or "low-kickback" chains. They have smaller cutters and often a sloped depth gauge, which is the part in front of the cutter that controls the depth of the cut. They are designed to significantly reduce kickback. They are commonly used on smaller, less powerful chainsaws and by users who are less experienced or particularly concerned about kickbacks. They cut slower than semi-chisels or full chisels.
The NewBeny 12-inch cordless chainsaw uses a Low Profile chain. This helps reduce kickback on this size saw, improving safety. Sharpening this chain typically requires a 4.0mm (5/32") file.
Semi-Chisel + Low Profile
This likely refers to a chain that uses the semi-chisel cutter shape but is designed with low-kickback features, often including ramped depth gauges and meeting low-kickback standards. It offers a balance between cutting performance and reduced kickback.
The NewBeny 8-inch cordless chainsaw and 6-inch cordless chainsaws utilize a Low-Profile chain. This chain reduces kickback risk and improves safety. It is suitable for home users or those who occasionally cut.
Always refer to your saw or bar manual for recommended chain types to ensure compatibility and safe operation. Three key measurements are needed to find the correct replacement chain: Pitch, Gauge, and the Number of Drive Links.
How to Measure The Pitch of a Chainsaw Chain
Pitch is a crucial measurement that determines how well the chain fits the bar and interacts with the saw's drive sprocket. It is the size of the chain links. The chain pitch must match the pitch of your saw's drive sprocket.
Pitch
Experts define pitch as half the distance between the centres of any three consecutive rivets on the chain. You can measure it easily. Common pitches are 1/4 inch, .325 inch, 3/8 inch Low Profile, 3/8 inch Standard, and .404 inch.
Measurement Method
Here is how to find the pitch:
- Check the Bar or Saw: The easiest way is often to look for markings. The pitch is usually stamped on the chainsaw bar near the mounting end. It might also be on the saw's body or the original chain packaging. Look for numbers like .325, 3/8, 1/4, or .404.
- Measure Manually (if no marking):
- Lay the chain flat and stretched out.
- Pick any three rivets in a row.
- Divide that measurement by two.
- Match your result to a standard pitch size.
- Use a Chain Gauge Tool: Some tools are specifically designed to measure chain pitch and gauge easily.
Always verify the pitch from at least two different sources, such as the bar's markings and the user manual, to ensure accuracy and compatibility.
How to Measure the Gauge of a Chainsaw Chain
Gauge is the thickness of the drive links. These are the links on the bottom that sit in the bar groove. The chain gauge must match the width of the groove in your chainsaw bar.
Gauge
Common gauges are .043 inches, .050 inches, .058 inches, and .063 inches. These numbers are in inches.
Measurement Method
Here is how to find the gauge:
Check the Bar or Saw
The gauge is usually stamped on the chainsaw bar near the mounting end like pitch. It might also be on the saw's body or the original chain packaging. You should check decimal numbers like 0.050, 0.058, or 0.063.
Use a Gauge Tool
The easiest and most accurate way to measure gauges manually is with a specific chain gauge tool. These tools have slots of different thicknesses. Slide a drive link into the slots until you find one that fits snugly.
Fit Test
You can fit a drive link into the clean bar groove. It should fit snugly but allow for relatively easy sliding. This is not a precise measurement, but it can give you a rough idea if you suspect the chain or bar might be mismatched. Do this with the saw off and chain brake on.
Always trust the markings on the bar or saw first. A chain gauge tool is the next best option if those are worn off.
How to Count the Drive Links
The number of drive links tells you the chain's overall length or size. For any pitch and gauge, the chain length is determined by the number of drive links in the loop. A chain with 72 drive links, each with a 3/8" pitch and a .050" gauge, is a specific length chain that fits certain bar sizes. Here is how to count drive links correctly:
- Remove the Chain: Take the chain off the bar. This makes counting easier and safer.
- Lay it Flat: Stretch the chain out straight on a flat surface.
- Find a Starting Point: Pick any drive link to start counting. It is helpful to mark it with chalk or a marker so you know where you began.
- Count Each Drive Link: Go along the chain, counting every single drive link. These are the links that sit in the bar groove and engage the saw's sprocket.
- Count Around the Loop: Continue counting until you get back to the marked drive link where you started.
- The Total is the Count: The final number you reached is the drive link count for your chain.
How to Measure The Chain Length and Size
The length of a chainsaw chain is not typically specified in inches, unlike the bar length. Instead, the chain's size is defined by the combination of its:
- Pitch
- Gauge
- Number of Drive Links
For example, a chain is described as having a "3/8" pitch, 0.050" gauge, and 72 drive links. All three numbers are required to obtain the correct replacement chain. You must match all three specifications to the chain recommended for your bar and saw.
How to Shorten a Chainsaw Chain (step-by-step guide)
Sometimes you need to shorten a chain. This occurs when you remove damaged links or if you have a chain that's slightly too long for your bar, assuming it's the correct pitch and gauge for that bar. You need specific tools for this.
Tools Needed:
- Chainsaw chain breaker
- Chainsaw chain rivet spinner or crimper
- Replacement rivets and tie straps (if removing damaged links)
- Safety glasses and gloves
Step-by-Step Guide:
Inspect the Chain
Lay the chain out and identify where you need to shorten it or remove a damaged section. If removing a damaged part, plan to remove the bad links plus one cutter on each side connected to the bad links. This usually involves removing a pair of drive links, the tie strap, and the cutter pairs connected to them.
Locate the Rivet to Break
To open the chain loop, you need to break a rivet. Select a rivet for the tie strap (the flat link). If you are just shortening the chain, decide how many links to remove (they must be removed in pairs to maintain the loop). Count back from where you want the new end to be to find the rivet to break.
- Use the Chain Breaker:
- Place the chain breaker on a sturdy surface.
- Position the chain in the breaker's jaws so the rivet you want to remove is directly under the punch pin.
- Align the punch pin carefully with the centre of the rivet head.
- Turn the handle of the chain breaker slowly but firmly. This pushes the rivet pin out of the links.
- Continue turning until the rivet is fully inserted through the links, thereby opening the chain loop.
- Remove Unwanted Links: Remove the section of chain you want to remove. Make sure your bar has the correct number of drive links left.
- Prepare for Reassembly: Connect the two ends of the chain. Connect a tie strap to one end and a drive link to the other. You will need a new rivet to join them.
- Insert the New Rivet: Place the new rivet through the holes in the connecting links (the tie strap and the drive link).
- Use the Rivet Spinner/Crimper:
- Place the chain ends with the new rivet into the rivet spinner or crimping tool.
- Position the tool's jaws or dies around the new rivet so they can flatten (crimp) or spin the end of the rivet pin.
- Turn the handle of the tool firmly. This spreads or spins the end of the rivet pin, creating a new head that permanently holds the links together. Follow the tool's instructions precisely.
- Check the New Joint: Inspect the newly joined link. Ensure the rivet is properly secured and the joint flexes like the other links.
- Test the Chain: Carefully reattach the shortened chain to your bar and saw. Tension is correct according to your saw's manual. Check that it runs smoothly around the bar. Do not run the saw at full speed immediately. Run it slowly for a few seconds to ensure the new joint holds and moves freely.
Shortening a chain requires care and the right tools. If you are not comfortable doing it, a professional shop can do it for you.
3. Conclusion
Measuring your chainsaw bar and chain accurately helps you buy the right parts, ensures your saw operates safely, and enhances your cutting performance. Remember to measure the cutting length of the bar from tip to saw body. For the chain, find its Pitch, Gauge, and count the Drive Links. Write these numbers down. Always double-check your measurements and look for these specifications stamped on your old bar or saw body. Refer to your chainsaw's manual for the sizes recommended for your specific model.
4. FAQs
How do I know what size chainsaw bar I need?
You should read the saw's manual for recommended sizes. You can also measure the cutting length of your old bar. uy a new bar matching your saw model's recommended or measured size.
How do I identify the correct replacement chain for my saw?
Find the Pitch, Gauge, and Drive Link count. These are usually on the bar, saw body, or manual. For the replacement chain, match all three specifications exactly.
How often should I replace my chainsaw chain?
You should replace the chainsaw chain when it shows signs of damage, such as excessive stretching or broken links. Look for excessive stretching or broken links. Lifespan depends on usage and maintenance.
Can I use a longer or shorter bar than recommended?
Experts recommend using the sizes recommended in your saw's manual. Wrong lengths affect performance and safety and can damage saw components.
How do I sharpen my chainsaw chain?
Use the correct file, guide, and depth gauge tool. File each cutter consistently at the right angle. If you are unsure, get professional sharpening.
What is the difference between chain pitch sizes?
Pitch refers to the distance between the centres of any three consecutive rivets on the chain, which must match the specifications of both the chain and the saw's drive sprocket. It must match your saw's drive sprocket and bar tip. Different pitches fit different saw sizes and work types.