
How to sterilize pruning shears? You will learn the correct way to sterilize your pruning tools now. It will keep your garden safe from disease. For instance, dirty tools can spread various pathogens, including harmful bacteria and viruses.
These include bacteria such as erwinia amylovora, spores such as diplocarpon rosae, and viral particles for which there is no cure. These diseases spread in minutes. Many gardeners overlook the potential diseases that can be transmitted via their shear blades.
Garden experts say sterilization is the frontline defence in integrated pest management. Sickness from contaminated tools costs farmers significant revenue because pathogens spread through mechanical transmission with frightening efficiency.
Knowing how to sterilize pruning shears can help promote healthier plants. Remember that plant sickness can start without proper sterilizationsterilisation protocols. For example, fire blight significantly damages apple trees. Subsequently, crown gall causes lumps on roses, and tomato mosaic virus decimates crops. Dirty blades carry infectious propagules that severely compromise plants' natural defences. Focusing on prevention is crucial; treating systemic infections can be challenging once they occur.
1. When Should You Sterilize Your Pruning Shears?
After Pruning Diseased Plants
Sterilize pruning shears immediately after cutting any sick plant. Limp leaves mean sickness, and weird colours and growths also tell you about the trouble. Cutting exposes your blade to millions of pathogens, meaning that touching a healthy plant can transfer the illness. Some pathogens remain viable on tools for weeks; Erwinia amylovora is one example that survives 30+ days on metal surfaces. Similarly, if you cut roses affected by black spot fungus, the spores may quickly transfer to neighbouring plants. Moreover, there is no cure for viral sicknesses, so you must remove sick plants and sterilise equipment to keep others safe.
It's wise to assume that tools can carry infectious material; even slight signs of illness indicate the need for sterilisation. Do not wait to sterilise, but sterilise before the next cut. Consequently, sterilising the tools will break the chain of transmission and reduce the risk of infection. Ensure that sterilisation supplies are readily available for prompt use. Skipping this step can lead to devastating losses; therefore, sterilising quickly saves your plants.
Between Different Plant Species or Varieties
Sterilize pruning shears when switching plant types, because pathogens often show host specificity. However, pathogens can also transfer between related plant families. Pseudoperonospora cubensis attacks cucumbers, melons, squash, and pumpkins. Sterilize between all cucurbits to protect your garden diversity. Treat each plant family separately for better biosecurity. Using dedicated tools helps, but sterilization is most important.
Also, sterilize between cultivars within the same species. This includes different rose varieties and apple rootstocks, as genetic variation may affect their disease resistance. This reduces the risk to vulnerable cultivars and protects your investments in breeding efforts. Ultimately, this shows you practice rigorous sanitation protocols.
Before and After Pruning Sessions
First, you must sterilize the pruning shear before the first cut. This avoids introducing exogenous contaminants. Tools collect dust and microbial populations when stored, so starting with sterile equipment ensures nothing harmful initiates infection early. Then, it is advisable to sterilise the shears again after finishing your cutting tasks. Do this before putting tools away. This prevents microbial growth during storage, ensuring the tools remain clean and safe for future use.
Sterilization at the end removes plant exudates and tissue fragments. These materials harbour microorganisms and harden onto blades, resulting in poor cutting and slow-healing wounds. Sterile tools make precise cuts, which help plants seal wounds faster through proper callus formation. Sterilization also extends tool lifespan by preventing corrosion caused by organic acids in plant residues.
Following Injury or Exposure to Contaminants
You will sterilize pruning shears if they come into contact with soil, as soil harbours numerous phytopathogenic organisms. Dropping shears exposes blades to soilborne bacteria, such as Ralstonia solanacearum, and fungal propagules, such as Fusarium species. These cause vascular wilts and stem rots. Also, sterilize shears after contact with bird droppings, insect frass, or animal waste, as these materials can introduce Salmonella, E. coli, and other facultative plant pathogens. Infected shears create ragged cuts that increase infection courts. Do not rest tools on the ground; use sanitized holders and dedicated tool belts to move shears. Consequently, sterilizing tools after exposure to soil removes pathogens and helps prevent infections.
2. How Often Should You Sterilize Pruning Tools?
General Frequency Guidelines
Sterilize between plants when working with disease-prone species such as roses, stone fruits, and solanaceous crops. Vegetable gardens with persistent disease issues require frequent sterilization. Commercial orchardists sterilize after each tree after dormant pruning operations. This prevents fire blight epidemics that can destroy entire blocks. Lower-risk tasks require less frequent sterilization than high-risk jobs. Deadheading healthy annual flowers is one example. Sterilize every 5–10 plants in these situations. Major structural pruning of woody tissue requires more frequent sterilization, while soft-stem pinching requires less. Adjust frequency based on disease prevalence data and your garden's phytosanitary status. It's better to practice caution; while excessive sterilization typically won't cause harm, inadequate sterilization can lead to outbreaks. Make sterilization an automatic, non-negotiable habit, as this provides the maximum disease suppression.
Factors Affecting Frequency
Sterilization frequency depends on local disease incidence, so higher pathogen pressure requires more frequent sterilization. Gardens with a good sanitation history need less intensive protocols. Adjust your schedule based on extension alerts and disease forecasts; monitor regional surveillance data as well. Additionally, environmental conditions can impact the viability of pathogens. Warm, humid weather accelerates microbial growth, reducing the required sterilant contact time, so sterilize more frequently during spring and fall. Cold temperatures slow down microbicidal kinetics, consequently extending sterilant exposure duration. High-volume operations that cut numerous specimens and diverse taxa require increased sterilization frequency. Professionals who make hundreds of cuts daily need systematic sterilization cycles. Take careful note of infection rates and adjust your sterilization frequency to ensure optimal protection for your plants.
3. What Should You Use to Sterilize Pruning Shears?
Isopropyl Alcohol (70%)
70% isopropyl alcohol delivers broad-spectrum antimicrobial activity with rapid action. It achieves 99.9% pathogen reduction in 30 seconds through protein denaturation and lipid membrane disruption. It denatures cellular proteins and dissolves viral lipid envelopes. Dip or wipe blades with a lint-free cloth saturated with alcohol. Alcohol evaporates completely, so it requires no rinsing and leaves zero phytotoxic residue. Steel blades resist corrosion when the exposure time stays under 5 minutes. Use it for high-value ornamentals or when working in infected tissues. Use it for rapid sterilization between cuts. Replace alcohol after 10 to 15 blade dips, as organic matter reduces its efficacy, and oil blade pivots afterwards to prevent joint stiffening from alcohol's degreasing action. Alcohol costs $3 to $5 per litre and is available at any pharmacy.
Household Bleach Solution
Sodium hypochlorite is an effective agent for oxidative sterilization. Use 1 part 6% bleach to 9 parts water. You can say that a final concentration of 0.6% will be sufficient. It destroys all bacterial vegetative cells, fungal spores, and viral particles within 30 seconds through oxidative damage to nucleic acids. You need to dip the blades completely in the solution for at least 30 seconds, then rinse thoroughly with potable water. This prevents chloride-induced pitting corrosion. Bleach is good at terminal sterilization. You can use it for end-of-season tool maintenance or during severe disease outbreaks. Prepare a fresh solution daily, as chlorine degrades by 50% in 24 hours when exposed to light, and store it in opaque containers. Always adhere to safety protocols when working with bleach, as it can irreversibly bleach fabric and cause skin damage at pH >12.
Hydrogen Peroxide
A 3% solution of hydrogen peroxide kills pathogens by generating reactive oxygen species. Spray or immerse blades fully, maintain contact for 1-2 minutes, then wipe dry. It decomposes into water and oxygen, leaving zero chemical residue or environmental impact. It causes 80% less corrosion on carbon steel than bleach. Use it for sensitive applications near water bodies or in certified organic production. Store in amber bottles at 77°F, as peroxide decomposes 10% monthly in clear containers, and replace stock every 3 months. Wear safety glasses when handling concentrated formulations that cause severe eye injury.
Commercial Plant Sterilizers and Disinfectants
Specialized quaternary ammonium compounds and stabilized peroxide formulations are available. They contain proprietary surfactants for superior penetration through organic matter. Products like Green Shield and Physan 20 deliver 99.99% kill rates against bacteria, fungi, and enveloped viruses. Follow manufacturer protocols exactly; verify dilution ratios and contact times. These suits commercial operations and wholesale nurseries with biosecurity mandates. Moreover, they maintain efficacy at 50% activity despite plant sap contamination.
Other Natural or Home Ideas
Some experts recommend vinegar, pine oil, or essential oils. Steam heat, UV-C irradiation, and disinfectant wipes are also mentioned. Scientific validation remains insufficient here, and efficacy is unreliable. For example, vinegar requires 30+ minutes of contact time at 20% concentration, and its results are unsatisfactory against bacterial endospores and some fungal spores. Open-flame sterilisation risks blade tempering and severe burns. Consumer disinfectant wipes lack adequate virucidal claims against plant pathogens. UV-C requires specialized equipment with a 254nm wavelength and proper dosimetry at 40,000 μW·s/cm². Stick with proven methods validated by agricultural research. Subsequently, use alcohol, bleach, and peroxide with documented efficacy, and avoid experimenting when crop health depends on proper sterilization.
4. Step-by-Step Guide: How to Sterilize Your Pruning Shears Properly
You must be thinking how do I sterilize my pruning shears? Below is the complete process for sterilizing your shears using proper technique.
Step 1: Clean Dirt, Sap, and Bits
You must mechanically remove gross contamination first, as this must precede chemical sterilization. Organic debris blocks sterilant penetration because sap and soil form a biofilm barrier. Similarly, sticky plant resins and latex exudates coat your blade. This prevents the sterilant from contacting microbial cells. First, you need to remove this protective layer. For this purpose, you will use a worn toothbrush. Scrub both blade surfaces with detergent solution and warm water. Focus on the rivet junction; polymerized sap accumulates and hardens there. These crevices harbour the highest microbial loads. Then, rinse the tools with clean water. Inspect blades under good light; any remaining residue compromises sterilization. Heavily soiled tools may require steel wool or 320-grit wet sandpaper for carbonized resin. Be careful not to remove protective coatings or damage cutting bevels. Finally, you must dry the blade completely. Water dilutes alcohol solutions below microbicidal thresholds. Keep in mind that for effective sterilization, a minimum solution concentration of 60% is needed.
Step 2: Prepare Sterilization Solution
You need to establish a sterilization station. To begin, set up your station before commencing pruning operations. This prevents rushing and skipping sterilization steps later. Pour 70% isopropyl alcohol into the dipping container. Use sufficient volume to fully immerse cutting edges—minimum 4 inches deep. A wide-mouth Mason jar with a screw lid works well; close the lid between uses. This reduces evaporation by 90%. Alternatively, mix one part household bleach. It will be 6% sodium hypochlorite with nine parts clean water. Use a plastic bucket and stir gently to mix, avoiding excessive aeration that releases chlorine gas. Secondly, prepare a reserve sterilant volume, since repeated blade immersion introduces organic contamination. The working solution loses 30% effectiveness after 8 to 10 dips; replenish from your reserve stock. Label all containers with contents and preparation date, and never combine different sterilant chemistries. Gather disposable paper towels for drying. Finally, stage rinse water in a separate container, as you need it to neutralize bleach residues.
Step 3: Apply the Sterilant
You must achieve complete immersion with adequate contact time. First, maintain immersion for a validated duration; brief dipping provides inadequate exposure. To achieve sterilization, sufficient contact time allows cell penetration. Use 30 seconds minimum for 70% isopropyl alcohol and 30 seconds for 0.6% bleach solution, or use 60-90 seconds for 3% hydrogen peroxide. Submerge the entire cutting edge underwater. Ensure sterilant contacts all metal surfaces, including pivot rivet and spring mechanisms. Alternatively, saturate lint-free cloth completely and maintain blade wetness if immersion is impractical, but keep blade surfaces visibly wet for the full duration. Watch for rapid solution runoff; oily residues prevent proper wetting. Re-clean the blade with detergent if this occurs. Immersion provides superior results compared to wiping, as it eliminates shadowing and ensures 100% surface coverage. Finally, sterilize the complete blade assembly; partial sterilization merely redistributes pathogens.
Step 4: Rinse and Dry Well
You should rinse only after using sodium hypochlorite bleach. First, rinse with the following proprietary sterilants per label directions, as they deposit corrosive residues. Briefly dip the blade in clean water or rinse under flowing water for 10-15 seconds. This removes all chlorine residues that cause pitting corrosion. Then, pour off excess water and dry the blade thoroughly with a clean, absorbent cloth. Use disposable paper towels to prevent contamination. You will notice that water will start oxidation reactions within minutes, especially on high-carbon steel blades. You must dry completely; passive air drying allows flash rust formation. Skip rinsing with isopropyl alcohol and hydrogen peroxide, since these evaporate completely. They leave no corrosive residues, though cleaning with a dry cloth still helps. It removes loosened organic particles suspended in the sterilant. Finally, inspect the blade after drying; water spots indicate incomplete sterilization, so you must repeat the protocol if observed.
Step 5: Lubricate and Reassemble (If Disassembled)
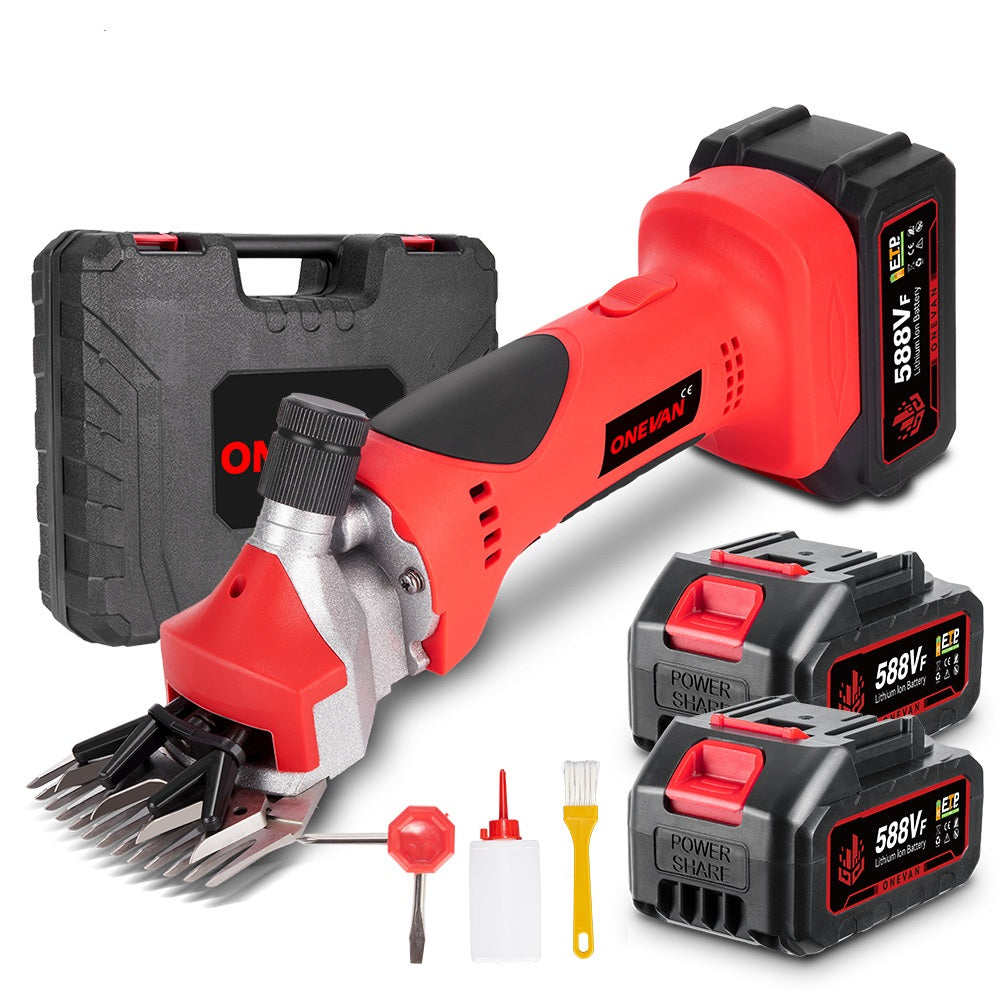
You will maintain mechanical function with proper lubrication. First, know that sterilants strip lubricants; alcohol and bleach dissolve protective oil films completely. Oil reduces friction and wear, and provides a corrosion barrier during storage. Apply a single drop of machine oil. Use mineral oil or 3-in-1 oil on the pivot screw. Then, open and close blades through the full range of motion. This distributes lubricant across bearing surfaces. You will clean any extra oil pooling on the blades, as it attracts dust and creates a sticky residue. Excessive oil transfers onto plant tissues, which can cause phytotoxic injury to tender shoots. Finally, reassemble tools if you disassembled them. Verify that all springs seat properly and that safety locks engage correctly. Your NewBeny 30mm Brushless Cordless Pruning Shears will deliver maximum service life with this maintenance protocol. You can deploy these cordless pruning shears across residential gardens, municipal parks, commercial farms, production orchards, and controlled environment greenhouses.
Step 6: Store Properly After Sterilization
You need to protect tools from recontamination. First, be sure not to place sterile tools in contaminated areas. Do not return them to contaminated tool bags or drop them in dirty buckets. This will undermine the effectiveness of your sterilization efforts. Designate a dedicated sterile storage location. A wall-mounted holder works well, or a tool case lined with clean cloth provides good protection. Then, store sterilized equipment separately. Keep them isolated from non-sterile tools, and this prevents all cross-contamination. Store tools slightly open; this permits air circulation. This prevents moisture accumulation and oxidation. Many gardeners set up a sterilization station at their pruning area, equipped with sterilizing solution and towels which enables rapid sterilization before the next use. Finally, storage must protect cutting edges and prevent environmental contamination. Organized storage facilitates quick retrieval and proper tool selection.
5. Safety Tips for Sterilizing Your Pruning Shears
You should never ignore safety protocols when sterilizing pruning shears.
Wear Safety Gear
Use nitrile gloves, safety glasses with side shields, and protective clothing, as sterilants can cause chemical burns and eye injuries. Accidents happen within seconds, so always use personal protective equipment. Gloves also protect against lacerations from sharp cutting edges.
Work in a Ventilated Area
Sterilants release volatile organic compounds and irritant gases. Bleach releases chlorine gas, which is a respiratory irritant at 1 to 3 ppm. Subsequently, alcohol vapours present a fire hazard with a flash point of 53°F. Work outdoors or in spaces with active ventilation providing 4+ air changes per hour. Do not inhale vapours directly, and take breaks every 20 minutes.
Handle Chemicals Carefully
Follow the manufacturer's safety data sheets exactly and review the hazard classifications. Use graduated cylinders for accurate mixing. Furthermore, store chemicals in their original packaging with intact labels, and keep them away from children and pets. Verify expiration dates because expired chemicals lose efficacy.
Do Not Mix Cleaners
Never combine different sterilant chemistries or toxic gases formed through chemical reactions. Do not mix bleach and acids, as this can release chlorine gas. Use one sterilization method per session, and rinse tools completely before switching chemistries.
Proper Disposal of Chemicals
Follow municipal hazardous waste regulations for chemical disposal. Dilute bleach solutions are generally drain safe with water dilution, but concentrated solutions require hazmat collection. Always dispose of chemicals properly, avoiding discharge onto vegetated areas or septic systems for environmental safety. Generally, bleach kills beneficial bacteria needed for septic function.
Hold Shears Safely
Always hold shears by the ergonomic grips for safety and ease of use. Avoid touching cutting edges during sterilization procedures. This prevents lacerations and recontamination from skin microbiota—engage blade locks when not actively cutting. Dry hands thoroughly or wear textured nitrile gloves, as this improves grip security and prevents slipping.
Keep Sterilants Away From Food and Drink
Maintain a sterilization station separate from food preparation zones. This prevents ingestion hazards. Wash your hands thoroughly with soap for 20+ seconds before eating, and remove all chemical residues first.
6. Conclusion
Make a tool sterilization standard operating procedure for all pruning activities, and disease management will succeed. Regular sterilization practices contribute to healthier plant growth and the prevention of disease outbreaks. It reduces the time invested in remedial treatments. It protects capital investments in landscape and crop plants, and it demonstrates professional-grade horticultural practices. Sharing sterilization protocols strengthens community plant health. Prioritize sterilization; even premium tools transmit pathogens if contaminated with infectious material.
7. FAQs
Can I use rubbing alcohol instead of bleach?
Rubbing alcohol works excellently for routine sterilization between cuts. It achieves rapid pathogen kill, and it requires no rinsing step. For shears like the NewBeny 32mm Brushless Cordless Pruning Shears, alcohol is preferred due to its corrosion-inhibiting properties. However, bleach provides superior sporicidal activity against resistant fungal spores and bacterial endospores.
How do I sterilize electric or battery-powered pruning shears?
Do not dip electric cutters into liquid sterilants, as moisture can damage electrical components and battery terminals. Use 70% alcohol on a lint-free cloth. Wipe cutting surfaces for 30 seconds minimum, ensuring the cloth maintains contact across the entire blade. Avoid bleach solutions that corrode electronic connections. Remove the battery pack or disconnect power first. Follow the manufacturer's sterilization specifications in the user manual.
Will sterilizing damage my shears over time?
Bleach causes accelerated corrosion and surface pitting. This happens if you neglect post-sterilization rinsing and lubrication. However, properly executed sterilization protocols won't damage tools. Opt for milder sterilants, such as 70% isopropyl alcohol, for routine use. Always rinse bleach-treated tools, then apply a corrosion-inhibiting oil afterward, as this helps maintain edge retention and extend service life.
Can I sterilize shears without disassembling them?
Wiping or immersion sterilization of assembled tools suffices. This works for routine sterilization between plants during active pruning. However, disassemble tools for comprehensive sterilization. Do this annually or following severe disease contamination. Proper disassembly allows sterilants to reach pivot mechanisms and ensure thorough cleaning. It sterilizes springs and internal crevices, too, where plant sap and microbial biofilms accumulate significantly.
What’s the safest sterilization method for organic gardeners?
The safest and most reliable method is 70% isopropyl alcohol. It evaporates rapidly and completely, so this leaves virtually no residue in the soil. Hydrogen peroxide is also excellent because it naturally decomposes into water and oxygen via catalase. Consider avoiding household bleach in conditions where the introduction of chloride salts cannot be tolerated if you prioritize zero synthetic chemical inputs in certified organic production systems.