
If you are looking for versatile power tools, consider the capabilities of cordless chainsaws. I've used mine for everything from trimming overgrown branches to crafting wooden bowls and creative outdoor projects. Isn't it amazing how one tool handles both practical yard work and artistic endeavors? You don't need to be a pro; just grab your saw and transform your space with these lightweight, ready-when-you-are powerhouses.
1. Why Cordless Chainsaws More and More Popular
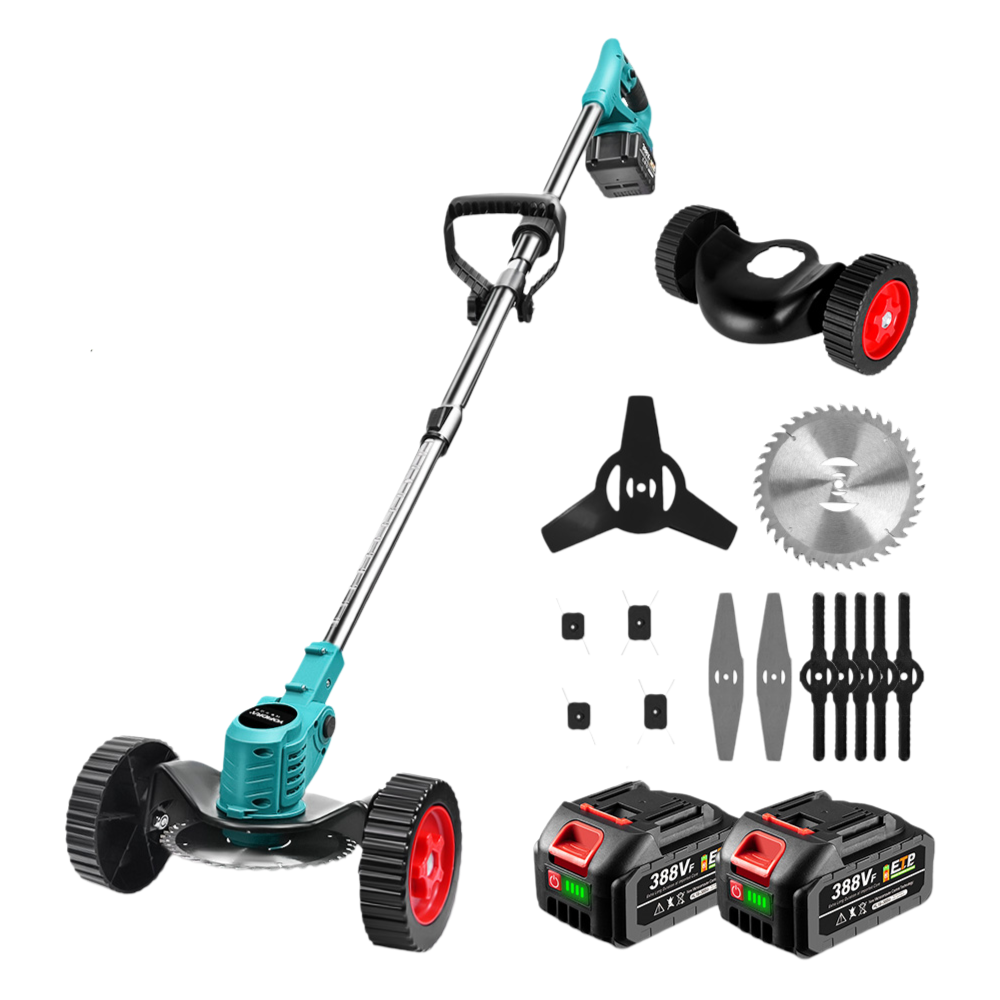
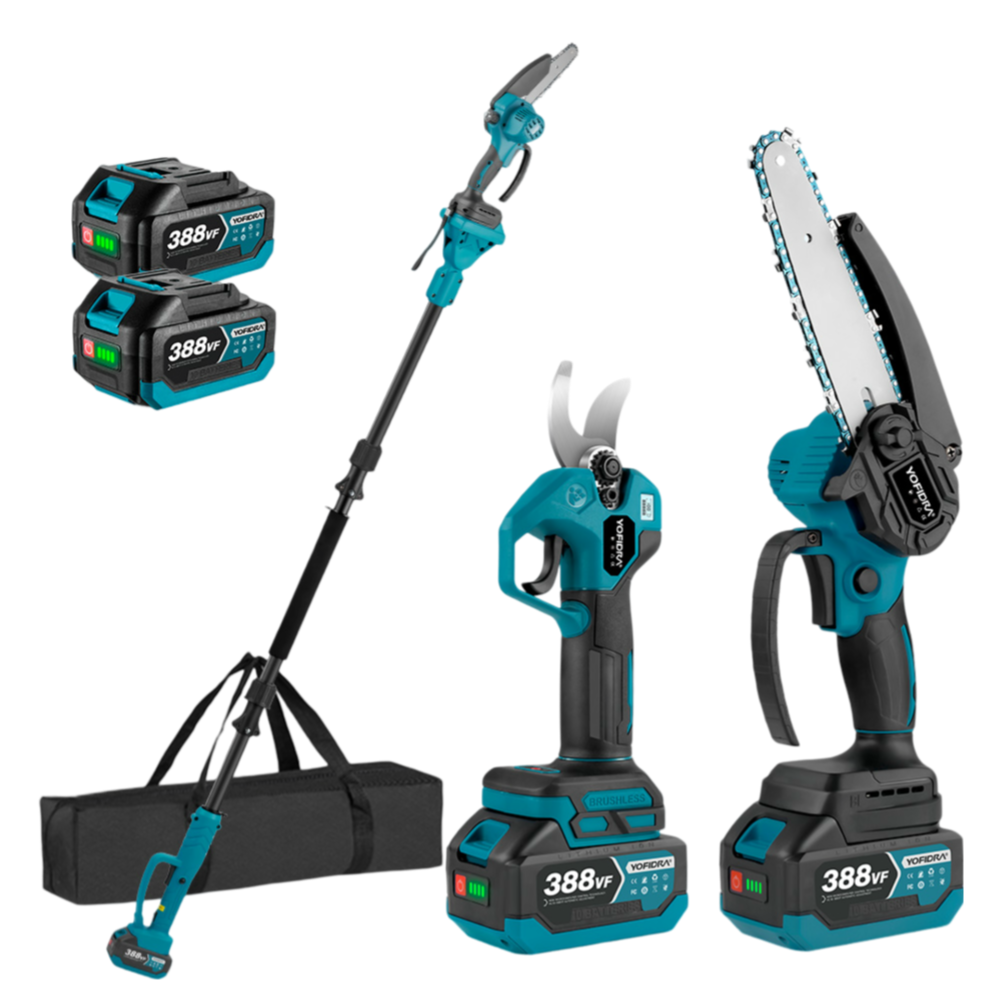
There has been a noticeable shift towards cordless chainsaws lately. I certainly did, too! Today, cordless saws like the Newbeny offer more than enough power for your cutting needs. If you prefer quieter operation, the Newbeny cordless saws are suitable for you, with noise levels ranging from 78 to 89 decibels, compared to over 110 decibels for gas models. Who wants to lift extra weight? Compared to the bulky 5.8kg+ gas models, the Newbeny cordless saw range weighs just 1kg for the lightest 6-inch cordless saw and 4 kilograms for the heaviest 16-inch cordless saw (with batteries installed). Your arms won’t feel like jelly after pruning overhead branches with the Newbeny cordless saw.
Below, I will introduce you to the following 5 Practical Scenarios in which I use a cordless electric saw—from Tree Trimming to Artistic Woodcraft. In some scenes, you may not have thought that an cordless saw could be used in this way.

2. Tree Branch Trimming with Cordless Chainsaws
Ready to tame those wild branches in your yard? Cordless chainsaws blend power and ease for precise tree trimming without the need for gas or cords. Whether you maintain fruit trees or clear storm damage, these tools make branch work simple.
Preparation and Planning
Before you start your cordless chainsaw, check each tree. Walk around and find which branches need removal - dead, diseased, or crossing limbs that harm the tree or create risks. Note which way each branch will fall and clear your work area. Safety comes first; wear cut-resistant gloves, eye protection, a helmet, and sturdy shoes with a non-slip sole. Ensure that the battery of your chainsaw is fully charged. Check that the chain sits tight (you can pull it slightly from the bar but not see the drive links) and stays sharp enough to cut clean without force.
Starting and Basic Operation
Cordless chainsaws start with ease. Just press the safety switch, then the trigger to start the chain. Hold your chainsaw with both hands - your main hand on the rear handle with the trigger and your other hand on the front handle. Stand with feet apart and stay to the side of the cut path, not behind the saw. When you cut, let the saw do the work with light pressure; forcing the blade can cause kickback and rough cuts. The chain should run at full speed before it touches wood and keep the same speed through each cut for clean results.
A lightweight 8-inch cordless chainsaw like the NewBeny 4500W 8 Inch Brushless Cordless Chain Saw is ideal for tackling those tree branches. Its adjustable cutting angle helps when reaching for branches at different angles. In simple terms, being cordless makes moving around the tree much easier without tangling or extension cord limits.
Branch Trimming Techniques
For big branches, use the three-cut method to stop bark tears and tree harm. Start with your undercut about 12-18 inches from the branch collar (the thick area where the branch meets the trunk), cutting up about one-third through the branch. This first cut prevents the bark from tearing when the branch falls. Next, make your overcut a bit further out, cutting down until the branch breaks free.
With the weight gone, make your final cut just past the branch collar, at a slight angle out to help the tree heal. For small branches under 2 inches thick, one straight cut past the branch collar works well. For high branches, use a stable A-frame ladder positioned away from areas where branches may fall, or try a pole saw that gives you reach while you stay on the ground.
Clean Up and Disposal
After you trim, gather all cut branches right away to clear trip risks and see your work better. Small branches and twigs can go through a chipper to make mulch for garden beds or paths. Cut large branches to short lengths and bundle them for yard waste pickup or split them for firewood. Some towns have designated days for wood waste pickup, so check local rules first.
Clean your work area well, and remove all twigs and dust that might hide risks or stop grass growth. Clean your cordless chainsaw too, wiping sap and bits from the chain and bar before you store it so it stays ready for your next job.
2. Outdoor DIY Ideas with Cordless Chainsaws
Transform your outdoor space with these simple yet impactful DIY projects using a cordless chainsaw. These projects combine creativity with functionality to enhance your garden or yard.
Building a Simple Garden Bench:
Step 1: Material Prep
Choose strong outdoor lumber, such as cedar, redwood, or treated pine, for constructing a bench. Measure and mark wood pieces for a 4-5 foot bench. Before you start, put on safety gear, including gloves, eye protection, and ear protection. Secure each piece before cutting with your cordless chainsaw.
Cut two 4-foot pieces for the seat, four 18-inch pieces for legs, and four 15-inch pieces for supports. Check all measurements after cutting to make sure everything matches and will fit together correctly.
Step 2: Assemble the Frame
Lay out all cut pieces on a flat surface to see how they fit together. Place two legs parallel to each other, about 4 feet apart. Connect the legs with support pieces to create a frame. Use 3-inch deck screws that are weather-resistant. Drill pilot holes first to prevent the wood from splitting.
Make sure corners form right angles using a carpenter's square. Put at least two screws in each joint for strength. This foundation step ensures your bench will stay stable for years.
Step 3: Attach the Seat
Place seat planks across the frame with small gaps (1/4 inch) between each plank to let water drain. Line up the front and back edges evenly. Drill pilot holes through the planks into the frame. Attach each plank with two screws at each support point. Check that all planks sit level and connect firmly to the frame. Test the seat by pressing on it to make sure it holds weight without moving. This creates the sitting surface of your bench.
Step 4: Sanding and Finishing
Sand all surfaces, starting with rough sandpaper (80 grit) and moving to finer sandpaper (120 grit). Focus on the seat and areas people will touch. In simple terms, This creates a smooth finish that feels good against the skin. Work in the direction of the wood grain to avoid scratches and damage.
Round the edges to prevent splinters. This makes the bench safer, especially for children and elderly users. Use steady, even pressure to create consistent curves around all edges.
Let the first coat dry for 24 hours before adding a second coat. The next point is important—do not rush this process.The wood needs time to absorb the product properly. Apply the second coat using the same technique as the first.
Wait for two to three days before using the bench. This final step protects your bench from weather damage and makes it last longer.
Creating Raised Garden Beds:
Step 1: Cut the Sides
Select rot-resistant wood like cedar, redwood, or treated lumber at least 1 inch thick. Measure and mark boards for your bed size (usually 4×8 feet or 4×4 feet). Place the wood on a stable surface before cutting. Wear all safety gear before using your chainsaw.
Cut two long sides and two short sides for your bed. Standard beds use 10-12 inch wide boards. For taller beds, cut multiple boards for each side or use wider lumber. Sand cut edges to remove splinters.
Step 2: Assemble the Box
Stand your boards on the edge to form a rectangle or square. Use metal corner brackets for extra strength. Drill pilot holes at each corner to prevent splitting. Join corners with 3-inch exterior screws, using three screws per corner.
Check that your structure forms a perfect square by measuring diagonally from corner to corner—both measurements should match. For larger beds, add middle supports every 4 feet to prevent bowing. Consider lining the inside with plastic to help the wood last longer.
Step 3: Add Support (Optional)
For beds taller than 12 inches, cut 24-inch stakes using your chainsaw. Place stakes at each corner of the bed. Drive them 8-12 inches into the ground for stability. Attach stakes to the bedsides with screws. For beds longer than 6 feet, add extra supports along the middle of each side.
Cut additional stakes for these middle supports as necessary. These supports keep your garden bed from bulging outward when filled with wet soil. Large beds might need cross-braces underneath for extra strength.
Step 4: Line and Fill
Clear any grass or weeds from where your bed will sit. Place the assembled bed in its final spot. Put cardboard on the ground inside the bed to block weeds. Add landscape fabric over the cardboard, overlapping edges by 6 inches. Secure fabric to the top edges with staples.
Fill the bed in layers: 4 inches of sticks or branches at the bottom, 4 inches of compost in the middle, and 8-12 inches of garden soil on top. Mix in compost or peat moss as needed for your plants. Water the soil to help it settle before planting.
3. Small-Scale Woodcraft with Cordless Chainsaws
Discover the art of small-scale woodcraft using cordless chainsaws, a perfect blend of power tools and artistic expression for creating unique wooden items.
Carving Simple Wooden Figures:
Step 1: Select Wood and Blank Preparation
Choose softwoods like pine, cedar, or basswood for your carving project. These woods are easier to cut and shape. Look for pieces without knots or cracks. Measure and mark your wood block to match the size of your planned figure. Secure the wood on a stable surface like a sawhorse before cutting. Put on safety gear—eye protection, ear protection, and gloves.
Use your cordless chainsaw to cut the block to size and rough out the basic shape of your figure. Make controlled cuts to create the general shape. Remove the larger chunks of wood that won't be part of your final figure. In simple terms, you're just creating a rough outline at this point. You can always cut more wood later, but you can't put it back once it's gone.
Step 2: Initial Shaping
The next point is to define the main features of your figure. Hold the chainsaw with both hands and make controlled cuts to create the basic form. Separate the head from the body, create limbs, and establish the overall posture. Work step by step and look at your work often from different angles. For a human figure, first cut to separate the head, torso and limbs.
For animal figures, define the head, body, and legs with clear cuts. Make straight cuts for flat areas and curved cuts for rounded forms. Keep the chainsaw moving to avoid uneven spots. Remember, the chainsaw works best for removing larger sections—not for fine details. Always keep a safe distance between the chainsaw and your body, and don't force the cut if the chainsaw gets stuck.
Step 3: Detail Carving
Once you have the basic form, switch to smaller hand tools for adding details. Use carving knives, gouges, and chisels to define features on your figure. A V-tool helps create lines between features. U-gouges help create curved surfaces. Sharp knives allow for precise work on faces or other small parts. Work from larger details to smaller ones, turning your piece often to check your progress.
For facial features, start with basic eye, nose, and mouth positions before refining them further. For clothing or fur, use the right tools to create patterns. Take breaks to rest your hands and check your work. You will notice that in wood carving, it's often better to suggest details rather than try to make them perfect—people's eyes will fill in the rest.
Step 4: Sanding and Finishing
Start the finishing process by sanding your carved figure with rough sandpaper (80 grit) to remove tool marks. Then, use medium (120-grit) and fine (220-grit) sandpapers until the surface feels smooth. Pay extra attention to areas where different sections meet. Clean off all sawdust with a cloth before adding any finish. For a natural look, apply wood oil (linseed oil or tung oil) that brings out the grain.
For more color, use wood stains or paints. After coloring, protect your work with a clear coating like polyurethane, applying 2-3 thin layers and light sanding between layers. Let each coat dry fully based on the product instructions. Essentially, the finish enhances the appearance of your carving and protects it from damage over time.
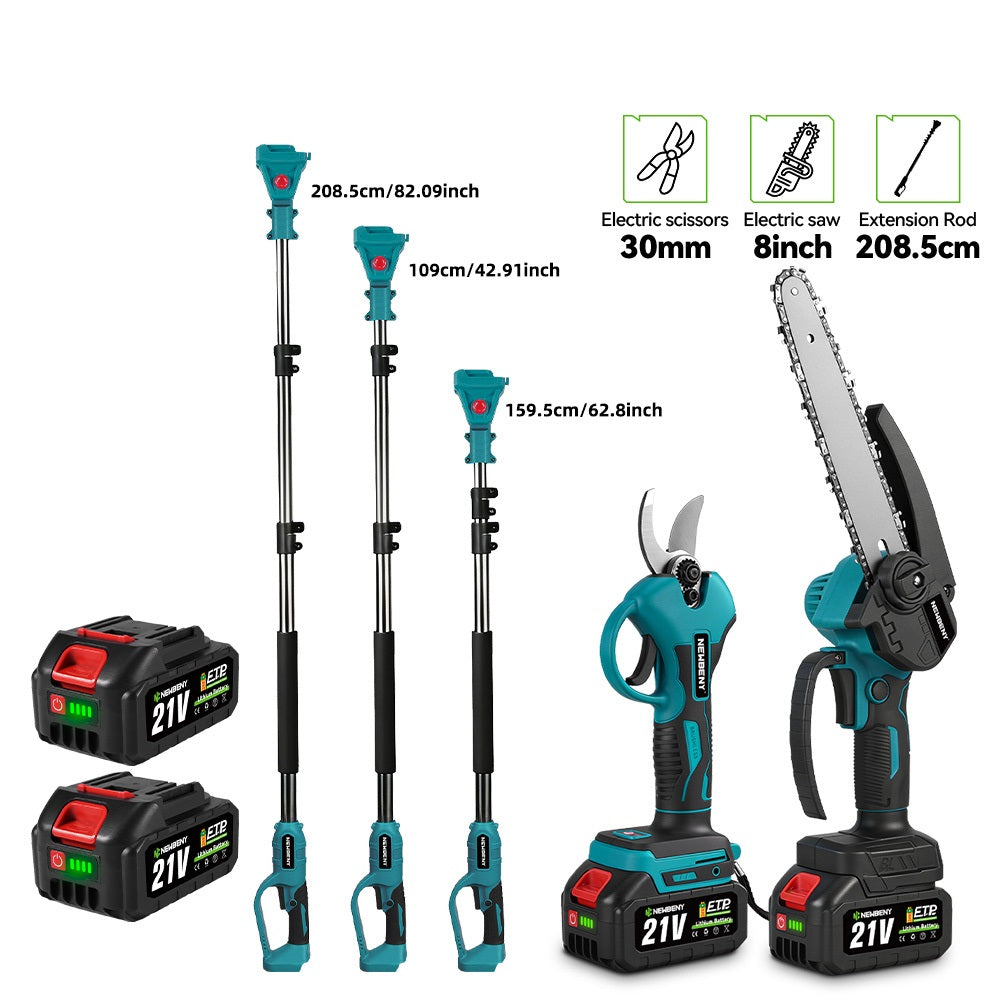
Even for woodcraft, if you're working on slightly larger sculptures or want to hollow out bigger bowls, the NewBeny 21V 12-inch cordless chainsaw can be beneficial for the initial, faster material removal. For instance, the extra power and longer bar of the 12-inch NewBeny will speed up the rough shaping stage considerably.

4. Woodcutting with Cordless Chainsaws
Learn to cut wood with a cordless chainsaw. This guide covers basic techniques, safety tips, and best practices for small woodcutting tasks.
Preparation and Planning:
First, check what type of wood you need to cut. Is it hardwood or softwood? How thick is it? This helps you plan your approach.
Next, plan your cuts. Look at the wood grain and spot any nails, rocks or knots that could damage your chainsaw. Mark your cutting lines with chalk if needed.
Gather all your safety gear. You need gloves, eye protection, a helmet, and sturdy boots. Safety comes first with any chainsaw work.
Check your cordless chainsaw. Make sure the battery is fully charged. The chain should be tight but not too tight, and it must be sharp for clean cuts.
In simple terms, a dull chain makes poor cuts and drains your battery faster.
Set up a stable work area. Clear away sticks, tools, and trip hazards. You need room to move and a flat surface to work on.
Basic Woodcutting Techniques:
To start your cordless chainsaw, check the owner's manual first. Most have a safety lock you press before the trigger works.
Hold the saw with both hands at all times. Keep your left hand on the front handle and right hand on the rear handle with the trigger.
For small logs (up to 6 inches), use a single cut. Place the log on a stable surface. Start the saw and let it reach full speed. Lower the chain onto the top of the log with steady pressure. Let the saw do the work - don't force it down.
The next point is the two-cut method for larger logs. Make your first cut from the top, going about 1/3 of the way through. Then, make your second cut from the bottom to meet the first cut. This prevents the chain from getting pinched when the wood shifts.
For felling small trees (under 6 inches in diameter): Make a notch cut on the side facing the direction you want the tree to fall. Cut downward at a 45-degree angle, then horizontally to create a wedge-shaped notch.
Make the back cut on the opposite side, slightly above the bottom of the notch. Leave a small amount of wood between the back cut and notch. This "hinge" helps control the fall direction.
So remember, only fell trees if you know what you're doing. Many tree jobs are best left to pros.
Limbing and Branch Removal:
After a tree is down, you can remove the branches. Start at the base of the trunk and work toward the top.
When possible, cut branches from the top side. This prevents the chain from hitting the ground and prevents pinching.
Stand on the opposite side of the trunk from the branch that is being cut. This keeps the trunk between you and the chainsaw for safety.
You will notice that some branches are under tension. Cut these with extra care. Make a small cut on the compression side first, then cut through from the tension side to avoid kickback.
For trimming knots and rough spots, hold the saw steady and use the midsection of the bar, not the tip. Cut slowly with controlled movements.
In simple terms, plan each cut before you make it. Think about where the wood will move when the cut is done.
5. Creative Tool Hacks with Cordless Chainsaws
Cordless chainsaws offer surprising versatility beyond cutting trees. This section explores creative applications where these powerful tools can simplify projects and unleash creativity. By applying the right techniques and safety measures, common materials can be transformed into art.
Ice Carving (Rough Shaping - in cold climates only and with extreme caution)
Step 1: Prepare Ice Block
Obtain a large, clear block of ice. This requires safe working conditions in a very cold environment. Work on a flat, stable surface away from heat sources. The ice should be free of cracks and at least 12 inches thick for stability during carving.
Step 2: Outline Basic Shape
Mark the basic outline of the ice sculpture on the ice block. This will guide your cutting and help prevent mistakes. Use a sharp tool to score the ice or apply food coloring with a brush for visible lines. Consider making your markings on multiple sides of the block for better accuracy.
Step 3: Rough Shaping with Chainsaw
Carefully use the cordless chainsaw to remove large sections of ice and create the rough shape of the sculpture. In simple terms, this is highly specialized and risky. Use extreme caution and PPE suitable for ice carving. Start with the largest cuts first and work inward toward your outline. Hold the chainsaw with both hands and make steady, controlled movements to prevent cracking.
Step 4: Detail Carving with Ice Tools
Refine the sculpture using ice carving chisels, saws, and other specialized tools. The cordless chainsaw is intended only for initial rough removal of ice, not for detailed work. Switch to hand tools like chisels and picks for fine details. Work from top to bottom to avoid damaging completed sections. Apply warm water with a spray bottle to smooth rough edges and add shine to your finished sculpture.
6. Conclusion
Cordless chainsaws are your go-to for yard work and crafts. From trimming branches to DIY benches and wood art, these lightweight, powerful tools make it easy. Enjoy quieter, simpler projects with cordless convenience, perfect for practical tasks and creative fun. Ready to transform your space? Grab a cordless chainsaw and get started!
7. FAQs
What are the core advantages of cordless chainsaws over gas-powered models?
Cordless chainsaws are lighter, quieter, and start instantly. They need no fuel mixing or pulling cords. So, you will notice they produce no fumes and need less maintenance. They also cost less to operate over time.
How to choose the best cordless chainsaw for woodcarving?
Look for a lightweight model with a 6-8 inch bar. Choose one with variable speed control and a slim tip for detail work. In simple terms, battery life matters for longer projects. A tool with good balance and an ergonomic grip reduces hand fatigue.
What professional techniques optimize tree branch trimming?
Cut branches from the bottom up. Make a small notch on the underside first to prevent bark tearing. Now, the next point is to cut at a slight angle away from the trunk. Keep both hands on the chainsaw and stand to the side of falling branches.
What's the maximum wood diameter a cordless chainsaw can handle?
Most standard cordless chainsaws can cut wood up to 10-12 inches in diameter. Larger 40V or 80V models can handle up to 16 inches. This depends on battery power, bar length, and wood hardness.
How to create child-safe wooden toys with a cordless chainsaw?
Use only untreated hardwoods like maple or birch. Rough-cut basic shapes with the chainsaw, staying well outside your final lines. You will notice hand tools are needed for all finishing work. Sand thoroughly to 220-grit and use child-safe finishes like beeswax.
How often should chainsaw chains be sharpened?
Sharpen after 2-3 hours of cutting or when you notice the saw forcing cuts instead of pulling itself. Dull chains create sawdust instead of chips. In simple terms, sharpen whenever cutting becomes slower or produces more heat.
What are balcony-friendly mini chainsaw projects?
Create small planters from logs. Carve decorative bowls or candle holders. The next point is that you can make simple bird feeders or small shelves. Choose projects that create minimal dust and noise out of respect for neighbors.
How to convert a cordless chainsaw into a woodcarving machine?
Mount the cordless chainsaw securely in a vise with the engine off. Use only the tip for carving, and never force the blade. Special carving bars with rounded tips offer better control. Remove the battery when making adjustments.
How are cordless chainsaws used in disaster scenarios?
Cordless chainsaws clear fallen trees and debris without needing fuel. They can access tight spaces where larger saws can't reach. In simple terms, multiple batteries allow continuous work when power is out. Their lighter weight reduces user fatigue during extended cleanup.
How to extend cordless chainsaw battery life via DIY hacks?
Store batteries at 40-80% charge in cool, dry places. Clean battery contacts regularly with alcohol. Keeping chains sharp reduces battery drain. Remove batteries when storing the tool long-term and charge them every three months.